Get the Nexus: The Jupiter Incident demo off WP (110mb)
This demo contains one single player mission. This mission is not part of the full game, which will be released this fall. In the demo mission you have to defend a space station which is under attack from one of the alien races that are in the full game. There are several ways to resolve the situation, which gives you some good replayability. We have included three difficulty levels, so with this readme at your side it should be reasonably easy to get into.
The following features have been excluded from the demo:
* Load/Save option
* Star map
* Briefing, Interactive briefing
* Diary
* Ship configuration (Fleetscreen)
* Movies
1.1.1 SYSTEM REQUIREMENTS
> Minimum Specifications:
Computer: 100% DirectX 8.1 compatible computer
Operating Systems: MS Windows 98SE/ME/2000/XP
CPU: Intel Pentium III 1.2 GHz or AMD Athlon 1.2 GHz processor
Memory: 128 MB RAM for Windows 98, 256 MB RAM for Windows ME/2000/XP
Graphics Card: NVidia GeForce2 DDR 64 MB or comparable graphic adapter
Sound Card: 100% DirectX 8.1 compatible Audio Device
Imput Device: MS Windows compatible mouse and keyboard
DirectX: Microsoft DirectX 8.1. NOTE: DirectX may require the "latest" drivers
for your particular hardware.
Installation: 240 MB free HD space
> Recommended Specifications:
CPU: Intel Pentium 2 GHz or AMD Athlon 2 GHz processor
Memory: 256 MB RAM for Windows 98, 512 MB RAM for Windows ME/2000/XP
Graphics Card: ATI Radeon 9200 or better, NVidia GeForce4 Ti or better
1.1.2 KNOWN ISSUES
The game might slow down on some DirectX 9 adapters if too many units are
visible on the screen. If the problem presents itself, it is recommended to
disable dynamic shadows or to run the game in DirectX 8 mode, available under
options.
1.1.3 INSTALLATION
The game needs at least 240 MB free memory on the hard drive. Initiate
installation by running nexus_singleplayer_demo.exe.
1.1.4 MAIN MENU
The following options are available in the Main menu:
* Demo mission - easy level - starts the demo on easy level
* Demo mission - normal level - starts the demo on normal level
* Demo mission - hard level - starts the demo on hard level
* Options - game settings
* Quit - quit game
1.2 CONTROLS
The controls may seem complex at first, but will become familiar after a little
practice. The game can be paused at any time using the Space key. You can issue
commands and move the camera as usual while the game is paused; these commands
will take effect as soon as the game is unpaused. We recommend using the
tooltips!
1.2.1 SCREEN
You can see your own units on the lefthand side. You can arrange the ship's
icons as you wish with the arranging options on the top of the list, and the
list becomes scrollable if it contains a large amount of ships. Thin lines
connect ships that belong together, for example carriers and their fighters.
The righthand side contains info about just everything else; enemies, neutral
objects and friendly units.
The lower left screen contains the info panel. When a ship is selected, all
information about it will be displayed; the captain's name, ship energy systems
and if the AI is allowed to use ammo-using weapon systems. You can also set the
ships behaviour here (more on that later).
The upper center contains the target info panel. Objects selected from the
right hand panel will appear here. It is mainly used in tactical combat, since
you can set specific target areas on the object. If you want to halt your
enemy, you need to set its engines as targets on the info panel and issue the
attack order with F6 (attack device).
The lower center contains the Command panel (more below). Above the Command
panel is the Manual panel, which displays info on your ship's systems. This can
be opened using the small Hand icon; alternatively it can be set to repair mode
using the Wrench icon. This panel is mainly used when controlling a ship
manually and for tracking the status of the ship's subsystems. You do not need
these when playing the demo on easy level.
On the lower right is the manual move control aid panel, which displays speed
and distance setting buttons.
1.2.2 CAMERA
It is of paramount importance to follow all events in the game. Your most
useful tool for that is the camera.
> Camera Focus
If you left-click any object in the unit list (friend or foe), the camera turns
into that direction. The camera will not move if the object is already visible
on screen.
> Camera following
Double clicking any object makes the camera jump to it and follow it - however
this camera can only be linked to already explored objects. If you double-click
an empty part of space, the camera is released.
> Fighter camera
If you double click on a docked out squadron on the own or enemy ship list
(left or right hand side), the camera follows one ship of the squadron.
> Zoom
You can zoom in or out on the selected object by using the mouse scroll button
or by pressing both mouse buttons and moving the mouse back and forth.
> Camera rotation
You may rotate the camera by holding the right mouse button. If the camera is
linked to an object, then it will move around it.
1.2.3 GAME CONTROLS
The game can be controlled in two modes; command or manual. Command mode is
recommended for less experienced players, while manual mode is recommended for
players who like to track all ship's systems and enjoy micro-management. Manual
mode requires an additional panel, turned on by clicking the Hand icon on the
screen. The same panel will display the ship's systems in command mode. The two
modes override each other!
> Command Mode
In Command mode you can give simple tactical commands. Commands contain all the
necessary instructions for the ship to execute the current task. For example
the Attack Devices (F6) command will make your ship move to the enemy and
attack it using its suitable weapon systems for the task.
In other words, commands manage all the necessary systems to complete the task:
approaching the target, mode of approach, shield, weapon, engine and support
system management, etc. All commands are issued by either clicking on the
buttons at the lower end of the screen or by pressing the corresponding
function keys (F1-F12).
> Manual Mode
This is the most advanced mode. You can set and decide everything from
individual weapon targeting and ship velocity vectors to subsystem energy
management.
1.2.4 ORDERS
> Auto (F1)
The ships is automatically controlled and will act and react to threats
depending on its behaviour setting.
> Approach (F2)
The ship will approach the target up to a 1-5 kilometers range.
> Hold Position (F3)
The ship holds at its actual position and will defend itself if necessary.
> Run Away (F4)
The ship will try to keep away from the designated object.
> Drain Shield (F5)
The ship uses its weapons most suitable to drain the opponents shields. In
order to do so it approaches the enemy until it reaches the ideal distance.
Useful if you have plenty of weapons suitable for shield draining.
> Attack Devices (F6)
The ship attacks the devices of the enemy by using its precision weapons. If
the devices are already identified, the various targets - for example weapons
and shields - can be selected (prioritized) at the top of the screen.
> Destroy Hull (F7)
The objective is to destroy the hostile ship and its crew. The ship will use
its most powerful weapons. The attack is most effective when the target's
shields are down.
> Artillery (F8)
The ship will try to remain within a certain distance from the target (5-10
kilometers), and will only use its long range weapons. This order is
particulary useful against ships that are good at close range combat.
> Recon (F10)
The ship tries to identify the enemy's equipment. According to its behavior
setting, it may also lower its shields in order to get the results faster.
> Guard (F11)
The ship protects the designated target - the target can only be a friendly
unit. The ship attacks every hostile unit attacking the protected target, but
it only engages one enemy at the time.
> Activate Interplanetary drive (F12)
The interplanetary engine accelerates the ship to such a speed that it can
escape battle. Because it requires huge amounts of energy, all systems except
for life support are shut down and the ship will become unprotected for a short
while. If any other commands are issued, the IP drive is turned off
immediately.
1.2.5 ISSUING COMMANDS
Issuing Commands is done primarily by mouse; left button selects and right
button confirms.
First, select the unit(s) that are to be given orders. This can be done by
clicking it or its icon, or in case of multiple units, either by holding down
the CTRL key and clicking the objects or by holding the left button and use the
lasso to select the desired units.
Select the order to be given the selected unit(s) with the LEFT button on the
orders panel, then RIGHT-click the target to issue your command. Some Commands
are bound to the pointer and are issued automatically. For example, if you move
the cursor over a friendly unit, the default Command will be GUARD. If you want
something else, you need to select it from the Command panel.
Some Commands can only be issued to/against either friendly or enemy units. You
can not attack your own ships. Some orders don't require targets, such as the
Patrol command for bomber squadrons.
A unit can only give one Command at the time, the latest issued Command will
always override the previous one.
Example: You issue an APPROACH command towards a nav point. The ships starts
moving, when suddenly a Gorg destroyer appears. You issue a Destroy Hull
command against it, which will override the Approach order. The ship won't go
towards the navigation point, it will now concentrate fully on destroying the
Gorg ship's hull.
1.2.6 MANUAL ORDERS
You can use manual mode to engage different devices on your ship. Just click on
the devices to activate them on the manual panel (turn it on with the Hand
icon). If the device needs a target, such as a weapon, then you can designate
the target using the right mouse button.
1.2.7 MANUAL MOVEMENT
Holding down the Shift key will switch the ship's movement to absolute mode,
and they will move the point of your choice. In this mode the ship won't move
relative to something, instead you can designate its exact destination.
While the Shift key is pressed, circles will appear around different objects in
space. These denote distance; the bigger the circle, the closer the object. You
have a circle of your own, which shows your destination. Set the distance by
pressing and holding the left mouse button and moving the mouse forward and
backward. When a circle starts flashing, it means it is about the same distance
as your circle (your destination). Holding the right mouse button will enable
camera rotation. The ship will start moving as soon as the Shift key is
released.
The bottom right panel shows information relevant to manual movement such as
speed, and you can also set your distance from the target (red triangle).
1.2.8 NAVIGATION POINTS
You can place navigation points to ease travel anywhere in space. You can use
the same method as with manual movement. The only difference is that you must
use the N key instead of Shift. The Nav point will appear as soon as the N key
is released. To delete a point, just select it and press the Delete key. You
can place up to 10 nav points at the same time.
1.2.9 ENERGY SYSTEMS
The ship's energy systems can be tracked and operated via the lower left panel.
All ships have four independent energy systems:
* Support
* Shield
* Weapons
* Engine
Support includes everything fitted to the ship which doesn't fit into the other
categories, like ECM, generators, energy cells etc.
Shield shows the actual shield energy usage.
Weapon shows the actual weapon energy usage.
Engine shows the actual engine energy usage.
All systems have their own generator which generates enough energy to enable
them to function normally. However, in some cases you need more energy for one
or more systems. In that case you can add +50% or +100% energy to the given
system by simply clicking on it. This additional energy won't come from the
other systems. It will come from the reserve energy, indicated in the ship's
info panel.
The effects of power rerouting:
* Support: More support equipment can be turned on at the same time, or you can
ensure the working of a support device in case of emergency (like with
radiation).
* Shield : Shield will recharge faster
* Weapons: More weapons can be fired at maximum rate of fire at one time.
* Engine: Speeds up your ship.
1.2.10 BEHAVIOURS
The ship's behaviour will decide how it will complete its commands. There are
four different behaviours:
* Aggressive
* Defensive
* Stealth
* Focused
An Aggressive ship will use all available means to achieve its goals and will
fire upon everything in its vicinity, including escape pods. It will seek out
targets on its own if left unattended.
A Defensive ship will not engage any enemies, but will hold and only fight if
attacked. It uses all available defensive measures.
A Stealth ship will attempt to stay undetected and will not use any high-energy
emission systems. If it's fitted with any stealth equipment, it will use it at
all times. It will also take advantage of any available hiding places in the
environment, such as asteroid shadows, etc.
A Focused ship will concentrate on one task at the time, ignoring all other
factors. For example, if it's issued a Drain Shield command, it will attack the
enemy's shields with all weapon energy, but will not fire at anything else, not
even with automatic weapons such as flak.
1.2.11 REPAIRS DURING COMBAT
Only the ship's devices can be repaired during combat, not its hull. Repairs
are automatic, but can also be controlled manually. The repair panel is turned
on with the Wrench icon. It will show all the devices on the ship, with a
status (HP) indicator. If the indicator is flashing, the device is being
repaired by the crew. Since your crew resources are limited, it may happen that
they cannot repair all systems at once. You can set the repair priority for all
items by clicking the number after the device name (1=low priority,
3=highest).
1.2.12 KEY MAPPING
The following keys can be used in the demo.
> Single player
Space = Pause (single player only).
Ctrl + 1-4 = Create ship group from selected ships.
1-4 = Select group.
Backspace = Select all ships in group.
F1-F12 = Use the command.
Mouse scroll = left + right mouse button + move mouse up or down = Zoom in or
out.
Shift + Zoom / move mouse = Move freely.
N = Create navigation point.
Delete = Delete selected navigation point (only which have been created with
N).
Insert = Lock camera on target.
M = Turn on or off manual panel.
R = Turn repair panel on or off.
O = Turn info panel on or off.
A = Select all capital ships.
Shift + 1-9 = Select own capital ship number 1-9.
Ctrl + Shift + 1-9 = Add or remove capital ship to or from selection.
S = Select all small ships.
Ctrl + S = Select all small ships under selected capital ship.
Esc = Skip movie, or bring up in-game menu.
More articles about Nexus: The Jupiter Incident








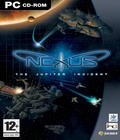 Nexus: The Jupiter Incident is a story-based single player strategy game. Starting in 2040, you are in control of the fleet of a multinational cooperation fighting a rivalling cooperation. The discovery of foreign technology leads to expeditions into space. When you return to Earth you find it occupied by Aliens. Only one colonizing spaceship with humans escaped. Your task is to find this ship, use it to build colonies and to finally gather enough strength to take back Earth.