Get the Star Wars: Republic Commando demo off WP (420mb)
Welcome to STAR WARS REPUBLIC COMMANDO, where the squad is your ultimate weapon.
Through the use of a new and innovative squad control system, you will become the leader of Delta squad, an elite and legendary commando team from the Republic’s clone army.
Delta Squad is…
--Delta 38 (a.k.a. “Boss”): You play the role of the squad leader Delta 38. Your leadership is the key to the success of Delta Squad.
--Delta 62 (a.k.a. “Scorch”): He is the joker of the group. Explosives expert and Anti-Armor specialist, Scorch loves to see things blow up and always follows it with a witty retort.
--Delta 40 (a.k.a. “Fixer”): Fixer is the “by-the-book” military man. He is the computer expert and slicer and is very proficient with the melee blade.
--Delta 07 (a.k.a “Sev”): The cold-blooded hunter of Delta Squad, he favors the sniper rifle attachment and is very particular about his kill count.
In this demo mission you and your squad are sent to the Wookiee home world of Kashyyyk to aid the native giants with a new enemy that is invading their home and threatening their very freedom. At the climax of the legendary Clone Wars, one squad is all the Republic has to prevent the hostile takeover of one of the most critical planets in the galaxy.
As the leader of the deadliest military squad in the galaxy, you must not let that happen.
------------------
Basic Instructions
------------------
----------------------
Weapons and Detonators
----------------------
You are equipped with the DC-17m Modifiable Blaster Rifle. Using the weapon selection keys you may switch to the Sniper Attachment for long range instant kills, the Anti-Armor attachment for high damage explosives, or utilize the primary blaster rifle for almost any situation.
Along with the recharging sidearm the DC-15s pistol, you are also able to pick-up enemy weapons such as the Trandoshan Concussion Rifle by standing near or pointing at the weapon and pressing the USE key. Then press the “5” key to switch to the secondary weapon at any time. You may only carry one Secondary
Weapon at a time. Picking up a new one replaces the last. Run over that same weapon to replenish ammo. NOTE: Some weapons have zoom options. So experiment with the “Z” key or the Middle Mouse Button to take advantage of that feature.
Commandos always have their detonators ready for action. With four different types at your disposal you can quickly toss any of them by using the Right Mouse Button. Cycle through the four types using the “Q” button.
The four detonator types are:
--Thermal Detonators, a general purpose concussive and incendiary charge.
--EC Detonators, an electricity-based charge with a very large area effect. Powerful against droids.
--Sonic Detonators, which stick to walls and are set off by proximity motion detection. Instantly detonates when throw near an enemy. Sonics do have a limited life span, however, and will explode after a small amount of time if not triggered.
--Flash Detonators, which are used to blind humanoid enemies and stun them so that the squad can finish the job.
And last but not least, never forget the quick and lethal melee attack. Available at all times, it’s the perfect attack for close quarters combat. In most cases it’s an instant kill.
---------------------
Squad Controls System
---------------------
Throughout the game there are contextual objects placed in the
world that the Commando Heads-Up-Display has identified as good
opportunities for a Squad Maneuver. Simply point at the objects
or icon and press the USE key. Press it again to cancel the
Maneuver if need be. If all of your commandos are occupied by a
Maneuver, ordering a new Maneuver will automatically disengage
the first of the commandos to previously be assigned.
Though squad mates have favorite maneuvers, each member of the
squad can perform any of the maneuvers with great success. Watch
the hint text in the upper center of the screen for information
on each Maneuver.
NOTE: Demolition Maneuvers must be activated again after the
explosive charge has been set by the squad member in order to
detonate the charge. Point and click.
SPECIAL NOTE: Though never critical, you can activate most
maneuvers yourself by standing near the object, pointing at it
and holding down the USE key. However, it’s generally safer and
more efficient to command your squad mates to accomplish the
same task.
In addition to the Squad Maneuvers you may also press the
function keys to control the general behavior of your entire
squad.
--“Search and Destroy” is their default behavior and they will
stay out in front of you blazing the trail and defeating any
enemy they see.
--“Form-Up” will order them to follow the player and stay
nearby, only firing when fired upon.
--“Secure Area” will order them to go to the position you are
pointing at and holding that area until otherwise commanded.
--“Cancel Maneuvers” is a quick way to remove the entire squad
from any Maneuver they are on and return to the last “stance”
ordered.
NOTE: The squad will automatically leave Maneuver positions
without your order if that Maneuver is no longer needed for the
situation.
-----------------------
Squad and Player Health
-----------------------
You and your squad are not dead until the entire group is
downed. You may revive your downed squad mates by standing near
them and pointing at them a holding down the Use button. You may
also order them to revive each other from afar using the downed
squad member as a Squad Maneuver.
If you are incapacitated yourself, you will have menu options to
order them to come revive you as well. If not in combat they
will come to your aid automatically. They are your second chance
at success, so keep them healthy at all costs.
Find a nearby bacta dispenser and step close and hold down the
USE key to recharge you health or order a squad mate to do the
same while standing at a distance and clicking USE as you would
with other Maneuvers.
NOTE: Squad members do many things on their own. They will not
only revive each other automatically if not engaged in combat,
but they will also seek out bacta stations and recharge their
health to full. Watch their squad icons to see what they are up
to.
----------------
Heads-Up-Display
----------------
Critical to the squad’s success is their advanced Heads-Up-
Display. Look for squad information in the lower left corner of
your HUD. It contains the squad ID number, health (color of the
icons), current order (icon symbols) and location arrows. In the
lower right corner you will find detonator type and count and
all weapon information on the actual weapons themselves.
The bottom center portion of the visor has your recharging
shields on either side of the HUD represented with an analog
blue bar. Once your shields are depleted your health will begin
to degrade until you are incapacitated. Your health is
represented by the green bars next to the shield display. Health
can only be recharged at bacta dispenser stations.
Another critical feature of the HUD is your objective indicator.
When your Squad Advisor wants to point out a critical object or
location to you he will put the objective indicator on that
object to call attention to it. When you are not facing the
object, an arrow and distance read-out will appear in the very
center of the bottom portion of your HUD. Turn to point the
arrow forward to see the bracketed objective location. That will
be your target.
Finally, your current mission objective is always displayed at
the top center of the screen. That area is also the location of
hint text that will come up contextually when you are pointing
at objects or Squad Maneuvers that you can interact with.
NOTE: Some Squad Maneuvers happen over a period of time. When
the squad is performing one of these maneuvers a circular timer
will appear around their icon in the lower left. Keep track of
their progress there. When you are performing the same action
the timer will be around the targeting reticule along with a
numeric timer.
------------------
Helmet Visor Modes
------------------
You also may use the Visor Mode cycle key to activate your three
Visor Modes available to you. By default you will always start a
mission in Tactical Visor Mode. This mode has extra tactical
information about your squad and your surroundings. This
includes squad names over their heads at all times, squad
location indicators on the sides of the HUD, weapon and ammo
hotspot indicators, and interactive object glow for all of these
items.
In addition to Tactical Visor Mode, you and your squad may also
utilize Low-Light Visor Mode to see more clearly in dark areas.
Don’t forget to turn it off when you no longer need it.
The third mode is Normal Visor Mode and it simply turns off the
features found in Tactical Mode for a more streamlined and less
cluttered view. You may cycle between all three of these as the
combat situation warrants.
NOTE: There are additional HUD and Visor Mode settings in the
options menu. If you care to fine tune them, seek out more
choices there.
Well there you have it. All the tools you need to make this Demo
mission a success. The Wookiees need your help, so get in there
and don’t let them down commando. The Republic is counting on
you and your squad.
###############################################################
Be sure to check the LucasArts website at www.lucasarts.com for
the very latest information related to STAR WARS REPUBLIC
COMMANDO.
###############################################################
---------------------------
Supported Operating Systems
---------------------------
To be able to play the STAR WARS REPUBLIC COMMANDO Demo, you
must have Windows 98SE, Millennium Edition (ME), 2000, or XP
installed and configured correctly, and your computer hardware
must be DirectX 9.0c compatible.
According to Microsoft, Windows 98 officially entered its
non-supported phase as of December 2004. Because of this,
some hardware manufacturers no longer develop drivers for
this operating system.
---------------------------
Minimum System Requirements
---------------------------
--------
Computer
--------
Required: 100% DirectX 9.0c compatible computer
---
CPU
---
Required: Intel Pentium 3 1.0 MHz or AMD Athlon 1000 MHz
Recommended: Intel Pentium 4 2.0 GHz or AMD Athlon XP 2400+
------
Memory
------
Required: 256 MB RAM
Recommended: 512 MB RAM
-------------
Graphics Card
-------------
Required: 64 MB 3D Graphics card with Hardware Vertex and Pixel
Shader (VS/PS) Capability
Recommended: 128 MB 3D Graphics card with Hardware Vertex and
Pixel Shader (VS/PS) Capability
----------
Sound Card
----------
Required: 100% DirectX 9.0c compatible Audio Device
------
CD-ROM
------
Required: 8X Speed CD-ROM drive
Recommended: 16X Speed CD-ROM or DVD-ROM drive
------------
Input Device
------------
Required: Keyboard and mouse
-------
DirectX
-------
DirectX: Microsoft DirectX 9.0c must be installed to play
the STAR WARS REPUBLIC COMMANDO Demo. A link to the Microsoft
DirectX page is available at the LucasArts website by going to
http://support.lucasarts.com/patches/dx.htm.
NOTE: DirectX may require the "latest" updates for your
operating system. This may also include the latest drivers for
your motherboard, sound, and video hardware.
Installation: Installation requires 610 MB of free hard drive
space. We recommend that you have an additional 200 MB of free
space available after installing the game for the Windows
swap/page file.
--------------------------------------
Multiplayer Supported In Full
Version of STAR WARS REPUBLIC COMMANDO
--------------------------------------
###############################################################
-------------------
General Information
-------------------
--------------------------------------
Installing STAR WARS REPUBLIC COMMANDO
--------------------------------------
Insert the STAR WARS REPUBLIC COMMANDO Disc 1 into your CD-ROM
drive. The launcher screen will open automatically unless
Autoplay is disabled. If it does not, double-click on the My
Computer icon, then the CD-ROM icon. This should bring up the
Launcher menu. If it does not, double-click on LaunchRC.exe
in the window that opens. Click on the top button from the
following options and the installer will guide you through the
installation process.
* Install
* Help
* Analyze Your Computer
* View Readme
* Go Back
* Options
* Visit www.lucasarts.com
* View License Agreement
* Go Back
* Exit
You will be prompted to choose Automatic or Custom Installation.
Automatic installs STAR WARS REPUBLIC COMMANDO into the default
location on your hard drive. Choosing Custom install allows you
to change the installation location and prompts you to add a
shortcut to the desktop and start menu. The default path is
C:Program FilesLucasArtsSTAR WARS REPUBLIC COMMANDO Demo.
--------------------
Administrator Rights
--------------------
If your computer is running Windows 2000 or Windows XP, you
will be unable install STAR WARS REPUBLIC COMMANDO unless you
are logged on with Administrative or Power User Rights.
After installing the game, you will be able to play the game
on a Limited or Restricted User account.
-----------------------------------
Running STAR WARS REPUBLIC COMMANDO
-----------------------------------
To run the game, click on your Start Menu, select Programs,
then LucasArts, then STAR WARS REPUBLIC COMMANDO and click on
“Play STAR WARS REPUBLIC COMMANDO”. This will bring up the
Launcher screen. Click on “Start Game” on the launcher.
---------------------
Desktop Color Palette
---------------------
We recommend that you set your desktop to True Color or Highest
(32 bit) color. When playing STAR WARS REPUBLIC COMMANDO with
your desktop set to a color palette other than 32 bit, you may
experience various problems while running the game.
--------------
Task Switching
--------------
Task switching is not supported in STAR WARS REPUBLIC COMMANDO.
-------------------------------
Launcher Disappears Off Desktop
-------------------------------
It is possible to move the Launcher off the Windows desktop
behind the Taskbar. When this occurs, you will be unable to
retrieve the launcher with the mouse. To access the Launcher
in Windows XP, right-click the taskbar and uncheck the Lock
the Taskbar option and the Launcher will pop back into view
on the desktop. To access the Launcher in Windows 98, Windows
ME, and Windows 2000, right-click the taskbar and choose
Properties from the popup menu. Now select the check box for
the Auto hide option and the Launcher will pop back into view
on the desktop.
--------------------
Weapon Damage Decals
--------------------
Weapon Damage Decals do not draw on all surfaces in the game.
This is due to a limitation of the graphics engine.
------------------------
Profile Selection Screen
------------------------
You must create or select a profile before you will be able to
exit the Profile selection screen.
###############################################################
---------------------
Default Game Controls
---------------------
Move Forward: W
Move Backward: S
Strafe Left: A
Strafe Right: D
Walk: Shift
Jump: Space
Crouch: C
Use/Activate/Pickup F
Fire Weapon: Left Mouse Button
Throw Detonator: Right Mouse Button
Zoom: Z or Middle Mouse Button
Cycle Visor Mode: X
Screen Shot: Print Screen
Melee Attack: E
Reload: R
Pistol: 1
Blaster: 2
Sniper Attachment: 3
Anti-armor Attachment: 4
Secondary Weapons: 5
Cycle Detonators: Q
Search and Destroy: F1
Form up: F2
Secure Area: F3
Cancel Maneuvers: F4
Quick Save F5
Quick Load F9
---------------------------
Joystick and Gamepad Issues
---------------------------
Gamepads and joysticks are not supported in STAR WARS REPUBLIC
COMMANDO.
----------------
Console commands
----------------
STAR WARS REPUBLIC COMMANDO console commands are primarily used
for development, testing, and product support purposes. Users
unfamiliar with these console commands should not attempt to
use them, as their use may result in game crashes, corrupted
graphics, and/or a variety of other issues. Console commands
and errors resulting from the use of console commands and/or
cheats are unsupported.
More articles about Star Wars Republic Commando





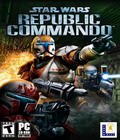 Star Wars Republic Commando is a squad-based first-person shooter that lets you explore the elite world of the Star Wars military.