Get the Combat Mission: Shock Force v1.11 Demo off WP (335mb)
Combat Mission Shock Force Demo (v1.11)
This demo showcases both the basic Shock Force game as well as the Marines Module, sold separately from the basic game. The Combat Mission: Shock Force Demo will require approximately 1 Gigabyte of free space on your hard drive in order to install.
DEMO LIMITATIONS:
* Includes three scenarios which can be played as either US or Syrian
* Includes a fourth scenario, "Demo Training" which was designed to only be played from the US perspective
* All multiplayer modes are active (TCP-IP, PBEM, Hotseat)
* You can access the full Game Editor, but the save function is disabled.
* The original full game manual is included as a pdf file
* The demo scenarios are only in English. See Game Language Info below for more details on how to play these battles in other languages.
DEMO SCENARIO INFO:
* Demo Training, a small training scenario designed to familiarize new players to Combat Mission before engaging in "real" combat. (Blue play only)
* Smashing Steel: A Syrian mechanized force heads south as an American Stryker and tank force heads north. (Battle begins before dawn in the dark, but as time progresses and the sun rises, visibility and lighting will increase)
* Going to Town: Stryker infantry mix it up with the Syrian forces as they enter a small town.
* USMC Going to Town: Marines combined arms force fights it out with a Syrian force in a small town. The battlefield is the same as the Stryker based Going to Town scenario in order to highlight the differences between the units in each.
TROUBLESHOOTING INFO:
Included with this patch is the most up to date troubleshooting guide. It is located in the game folder (filename Troubleshooting Guide.html) as well as in the BattlefrontCombat Mission Shock Force Demo Program Group located under the Start Menu.
ONSCREEN UNIT COMMAND MENU:
New to this version of Combat Mission: Shock Force is a selectable Command Menu. In order to view this new onscreen list of clickable commands, select a unit and press the SPACE BAR and a popup menu of available commands will appear. It's similar to the old CM1 command interface. The menu can be dismissed with another press of the space bar or a mouse click anywhere outside the menu.
HOYKEYS CUSTOMIZATION HELP:
Combat Mission has two distinctly different approaches for using unit Commands via the keyboard; Relative and Direct. The Relative system involves a set of 9 keys centered around three rows of three consecutive keys each. These 9 keys match the 9 Command Buttons in the user interface's Command Panel. Each hotkey controls the commands RELATIVE to the position on the screen. For example, by default the U key activates the Top Row Left-Most key which would be FAST, TARGET, and SPLIT depending on which Command Group is visible (Movement, Combat, and Special respectively). The Direct system, on the other hand, assigns a unique hotkey for DIRECT access to each Command. No attention is paid to the graphical representation on the screen. For example, if so assigned, F would issue the FAST command. T would issue the TARGET command, H would control the HIDE command etc... no matter which Command Group is visible on the screen.
There are pros and cons to each system. The Relative system allows the player to keep one hand stationary on the keyboard and does not require any "hunting and pecking" to find the right hotkey. The downside is that when you wish to use two Commands in a row that are in different Command Groups you have to first switch the proper Command Group (now done using the F5-F8 keys). The Direct system allows you to string Commands together without concern for which Command Group they are in, but does have the drawback of requiring the hand to move and locate a specific key, which may or may not be easily memorized. Which is "better" comes down to personal player preference, therefore both are provided.
Whenever possible, the order buttons under the various Command Panels will display the assigned "direct" key in highlighted green text.
Note, we recommend that you decide which system you prefer and then assign the keys as you wish by editing the hotkeys.txt file. The default key assignments have all 9 Relative keys assigned (UIOJKLM,.) as well as a selection of the most commonly used commands mapped to new Direct keys (Move Fast, Move Normal, Reverse, Target, Target Light, Face, Deploy, Pause, Hide, Dismount, Vehicle Open Up and Pop Smoke) to give you an idea of how the two systems work. We have found that using one or the other systems exclusively seems to have the best results and do not recommend mixing the two systems together. While it's possible to do, it could mean getting the worst of both systems and not really getting the benefits. Therefore, if you wish to use the Direct system we advise that you edit the hotkeys.txt file to unassign the 9 Relative hotkeys. Also, be aware to not double assign any keys to multiple functions.
In order to change the hotkey assignments, please see the hotkeys.txt file located in the game DATA folder.
CHANGING GAME RESOLUTION:
By default, the first time the game is launched, the games internal resolution and refresh rate are set to whatever your desktop display is currently set to. We have added two ways to make adjustments to this settings.
From inside the game, go to the Main Menu, then select the Options panel. From there you can select the game to run at the following resolutions:
Desktop = (the game will run at whatever resolution your desktop is set to)
1024x768
1152x864
1280x960
If you want to run the game in a resolution and refresh rate not listed, you can manually configure these settings by editing the "display size.txt" file located in your game directory. Simply change the numbers that you see there with the width (in pixels) and height (in pixels) and refresh rate (in Hertz) you wish to run the game.
Example: For 1440x900 at 75Hz refresh rate, you would delete the numbers in that file and replace with "1440 900 75" (without quotes).
If you put in all zeroes example: 0 0 0, the game will revert to using your desktop resolution and refresh rate.
Exercise caution and only use a resolution and refresh rate supported by your monitor as damage to your monitor or display adaptor could occur, especially if you use too high a setting.
MULTIPLAYER INFO:
Combat Mission: Shock Force uses the UDP and TCP port 7023 for all multiplayer games. If you are trying to HOST a TCP-IP game make sure and open port 7023 for both UDP and TCP traffic.
GAME LANGUAGE INFO:
You can change between the available languages from within the Options panel however we have only included scenarios for English. If you select any other language you will have to copy the scenarios files from inside the Demos FilesScenarios folder and place them into the appropriately named Scenario folder for your selected language.
If you make a change to the language setting, be sure and immediately exit the game and then reload in order for the game to properly prepare the language setting and files.
More articles about Combat Mission: Shock Force






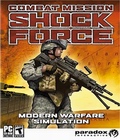 Combat Mission: Shock Force is a tactical military simulation depicting a hypothetical near future conflict between NATO and Syrian forces in Syria. A highly story driven semi-dynamic Campaign, from the US perspective, offers a completely new experience for "Combat Mission" fans.