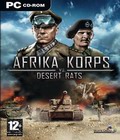
Get the Desert Rats vs. Afrika Korps Map Editor off WP (50mb)
You will find here the map editor for Desert Rats vs Afrika Korps. This allows players to create their own Multiplayer maps and play together on levels designed by themselves and other gamers.
To install the Map Editor, make sure you the DR vs AK version you have on your PC is version 1.18. The game version is displayed on the bottom right corner of the main menu screen. If you have another version than 1.18, install the 1.18 patch available on most game web sites.
Once you've checked the game version you have is 1.18, unzip the file "DRvsAK_Map_Editor_Files.zip" in a temporary directory, then select all files there and copy/paste them directly in the directory where you installed the game. When asked if you want to replace the files, answer Yes. The Map Editor is now installed. To launch the Map Editor, go in the directory where you installed the game, then launch "AKvsDR_Starter.bat".
Editor features for multiplayer map
Map definition
o Map size
o Modification of height on the map
o Placing tiles
o Placing objects (houses, trees, etc ...)
o Placing neutral units
Game mode definition
o Placing the HQ
o Setting the HQ mp
o Number of players
o Reinforcement time limit
o Army size limit of the map
o Start Location/Camera/Reinforcement arrive points
o Support locations
Unit balancing
o The editor will allow the player to modifiyng the units (soldiers, vehicles) properties and thus create its own balancing.
Known bug
An error may be displayed when you quit the editor.
NB: As all map editors, this map editor is delivered 'as is'. No support of any kind will be given to use it. It is neither optimised nor bug free.
File description
Below is listed the files needed to have a full multiplayer map working. It means that when you want to exchange maps, you must have all those files for one single map.
1. levelname.dds
It is the minimap, it is created with Photoshop.
You have to create this file yourself.
2. levelname.desc
It is created with a text editor. You have to create this file yourself. To make things easier, use an existing one that you re-work.
3. levelname.opt
It is the map.
To create it, in the Editor menu, choose File / Save optimised.
It creates a file called ".opt" and you have to add the levelname at the beginning of the name.
4. levelname.res
Not really needed, just a preload resource cache
5. levelname_scen.dds
It is the image on the scenario selection menu, it is created with Photoshop.
You have to create this file yourself.
6. levelname_texture_0..3.dds
It is the textures files. To create it, in the Editor menu, choose File / Save optimised.
It is saved as "_texture_0..3.dds" and you have to add the levelname at the beginning of the name.
General hints:
- When you place the icon of a start point of a unit, you have to precise the team (1, 2, 3 or 4) in the menu of the icon (which appears when you double-clic
on it). This determine the start location on the map.
- When you place the units for a 2 players map, it's no use to that you specify if the unit is from the Axis (unit name which begins with ax_ ) or from the Allied (unit names which begins with al_ ). It's the team number (1 to 4) which determines the Starting point.
- When you place the units for a 3 or 4 players map, you must specify if the unit is from the Axis (unit name which begins with ax_ ) or from the Allied (unit names which begins with al_ ). The team number are to be 1 and 3 for the Axis, and 2 and 4 for the Allied.
- For the reinforcement units, you have to specify on the way point if it is for the Axis (WPB) of for the Allied (WPG)
Hints to make water:
- In the menu bar, click on View, then choose Objects
- In the menu which appears, double-click on world, then in the window appearing on the left, double click on the line where is written Water.
- It makes a sub-list appear, there click on Enable, then just under, in the Level line, determine the height of the sea (e.g. -8).
- Make some holes in the map which go deeper than the value set (e.g. lower than -8).
- Then record the map and when you'll launch it in the game water will be displayed in the place where the depth is higher.
More articles about Desert Rats vs. Afrika Korps


