


 The power of the dragon is in your hands as D3Publisher of America announced that Dragon Blade: Wrath of Fire, a 3rd person action-adventure game where players unleash the magical powers of a fierce dragon, creating a unique and visually stunning weapon through their sword and arms.
Get the Dragon Blade: Wrath of Fire [Wii] Trailer off WP (15mb)
In a fantasy world devastated and scorched by powerful dragons, you will rise from the ashes a hero. But to fight fire with fire, you must find the pieces of the Dragon Blade—a sword that contains the soul and abilities of a dragon—and unleash a power unlike any seen before! Created specifically for the Nintendo Wii, Dragon Blade: Wrath of Fire is a 3rd person action-adventure game where players unleash the supernatural powers of a magical dragon, creating a unique and visually stunning weapon through their sword and arms. Players are immersed in the action as they experience parallel movement between themselves and their in-game character by using their dragon powers and hundreds of combat options to battle colossal enemies and embark on quests to upgrade their weapons and make them even more powerful. Offering an original storyline from best-selling fantasy author Richard A. Knaak, Dragon Blade: Wrath of Fire immerses players in an epic action-packed, arcade-style adventure through multiple unique fantasy worlds.
Jagira
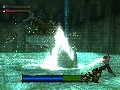
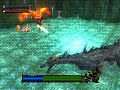
Jagira, the water dragon lords over kingdom of Gamar from his lair deep beneath the sewers of a decrepit castle. Because he can transform his body into liquid, he has flooded the land with rains, and overflowing streams and rivers so he can silently stalk the inhabitants. The only warning of his presence is a few seconds of water bubbling to the surface before he emerges and engulfs his prey.
Mobrius
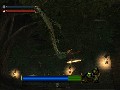
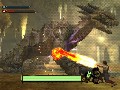
The slithering snake dragon Mobrius rules his kingdoms from high above the jungle treetops of Kai. His inner lair is a dense overgrowth of vines so that his long serpentine body can camouflage itself amongst the trees. His horned tail can be detached and thrown like a boomerang to ensnare any prey beneath him.

Skaroth
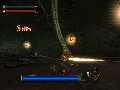
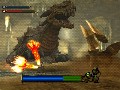
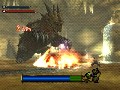
Skaroth is known as the Lord of the Dark Below who makes his home deep within the caverns in the heart of a snowpeaked mountain range. He wears an impenetrably thick shell of armor and bony horns atop his back made from the rocks of the mountain. The stalactites of his cavernous lair are his favorite weapon as he inflicts tremendous damage to anyone who crosses his path.
Features :
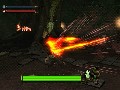
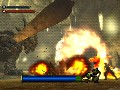
- Brand New Weapon System – Dragon Blade’s weapon system is unlike anything seen before as players unleash the dragon’s supernatural powers in the form of a flaming sword, dragon wings, claws, tail, fire-breathing head and more.
- Uniquely designed, two-handed Wii control scheme – Players will use both arms simultaneously to emulate the flaming sword and dragon powers.
- Original Storyline Exclusively On The Wii – Original story by Richard A. Knaak, one of the best-selling authors behind the immensely popular DragonLance series as well as other popular series based on Warcraft, Diablo, and the Age of Conan.
- Upgradeable Combat Systems – Players will utilize hundreds of combat options and experience the freedom and creativity to use them at any time during their adventure.
- Richly Detailed Fantasy Worlds and Challenging Environments – Embark on epic quests through 20 unique environments and 6 visually stunning worlds.
Release Date: September 25, 2007
Jagira
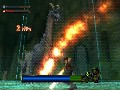
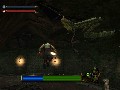
This fight opens with Jagira using his Wave Attacks and submerging after a few defiant roars at Dal. The roars are Jagira's weak point, as he is completely vulnerable while performing them. When Jagira rears up to do a Wave Attack, roll to his side to avoid it, and move up to his flanks in order to begin to attack him. Jagira will roar once or twice, allowing for some damage to be put in, but will submerge quickly after one of these roars, so be ready to roll backwards. If the submerge hits, it will do some major damage, so making sure that Dal is well clear of Jagira's body is a smart move. After submerging, Jagira will move to another area of the battlefield and re-emerge. This attack can also hit you as he rises, so make sure that you keep your distance. At this point, Jagira will repeat his Water Attack/Roar pattern, so keep up the pressure and you'll take down his first form in no time. When Jagira is reduced to no HP, he will go into his first Core Break, where you'll be able to hit a flashing Core to take him out of his first phase. Move quickly, as he will regain his health after a short time, and you'll have to take down another 10% of his life to try and break the Core again.
When Jagira moves into phase two, he will change up his pattern. Now he will be submerging more often, and using Water Mines on you while he is underwater, along with a Water Pillar that will track you as you move. Whenever he comes out of the water, quickly get in a few hits if he roars, or dodge and strike if he attempts to do a Wave Attack. After one of these two attacks, he will quickly go back underwater, at which time a random formation of Water Mines will appear around Dal. Your choice here is to either run at the mines and attempt to Dodge Roll through them, or to stay in the middle and try to dodge the Water Pillars Jagira will be sending at you from underwater. In either case, Jagira will resurface after 5 Water Pillars, at which time he will restart his sequence of Roar/Wave then submerging. Keep on him every chance you get and this phase will quickly be over.
Phase three is less of a hit and run affair than it was in Phase two, but Jagira will still be moving around a lot due to his new Charge ability. This phase will consist of Jagira getting ready, then charging at Dal, followed by a submerge and emerge somewhere else. Every couple of charges, Jagira will emerge from the water and either roar or Wave Attack, which will give a chance to get some damage in, so use it! As soon as he starts getting ready to charge again, move away so that you don't get trampled. Keep on Jagira, getting in hits when possible, and he'll soon be in a position to Core Break him. Follow the onscreen instructions and this fight will quickly be over, with the first Dragon defeated.
Mobrius
Another round arena, this time with a huge tree taking up a lot of the center area. Mobrius follows simple patterns for each phase, but like the last two bosses, will change up his attacks depending on which Core he is drawing his power from.
During the first phase, Mobrius will be attacking from the trees. He has three attacks that he will use in a pattern, but depending on his incoming damage, he can change up the pattern slightly, so be on the lookout for a different order. Normally Mobrius will attack with a Tail Whip, which can be avoided with a quick Dodge Roll, or the Dragon Wing Guard can be used to avoid a hit. This move is quick, so make sure to be ready to dodge at a moment's notice. The second attack that Mobrius will throw at you in this form will be the axe attached to his tail. This attack will send the axe flying around the room, and can be dodged pretty easily as long as you are ready for it. After a circuit, it will fly back up into the treeline and attach itself to Mobrius again, for use later. The third attack is what will give you the chance to deal out some damage to the Snake Dragon. This attack will have Mobrius biting directly down at Dal, and will do major damage as he snatches Dal up and throws him against the ground. This can be avoided with a well timed Dodge Roll however, and opens Mobrius up to attacks as he sits stunned from his lightning fast collision with the ground. After a moment, he will regain his sense and climb back up into the trees to repeat his attacks. Keep on him every time he tries and fails a Bite Attack, and this first phase will quickly be over for the Snake.
Phase two will place Mobrius underground, his grip on the tree having been loosened by the first Core Break. In this phase, Mobrius will slither around the tree and swipe at the player with his huge tail. If Dal is near to the rear of him when he surfaces, this will be the attack that Mobrius will let loose with. The only guard against this is to Dodge Roll or Wing Guard, as the muscles in Mobrius' tail will easily overpower Dal's normal block. If you are near the front of Mobrius when he goes to surface, he will let loose a Bite Attack, which can be Dodge Rolled, then will sit for a moment, allowing Dal to deal out some damage before Mobrius goes back beneath the ground. The trick to this phase is always staying near the front side of Mobrius so that he Bite Attacks more often than the Tail Attack. Keep up the assault every time Mobrius comes up for air, and phase three will begin after the second Core is broken.
In phase three, Mobrius will use a combination of ground based attacks and underground movement to fight Dal. While underground, boulders will fly around, and like Skaroth's boulders, will damage Dal if he is hit. After a moment of slithering around underground, Mobrius will come to the surface and attack. Most of the time, he will lead off with a spray of poisoned darts from his tail which can be Wing Guarded or Dodge Rolled from as normal. After this attack, Mobrius will bite at the player for a large amount of damage. Avoiding this Bite is the key to phase three, since Mobrius will be vulnerable for a moment after attempting to bite at Dal. Press home the attack during these times, then move away when he submerges to avoid the boulders. Wait for Mobrius to surface again, then wait for him to shoot out more spikes or skip right to the Bite Attack. Make sure not to be too close to him just before he would emerge, or else he might just use a Tail Whip instead, dealing you a quick bit of damage for your aggressiveness, as well as making the fight last longer with Mobrius underground. Taking down this phase requires patience, but playing a defensive game here will allow you to outlast Mobrius without taking too much damage.
Skaroth
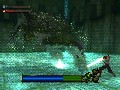
This battle is a large, round arena, giving you a ton of room to run around and avoid the area of effect attacks Skaroth will be throwing out from time to time. Much like Jagira, Skaroth has three distinct phases, and will use different abilities based on the phase he is in.
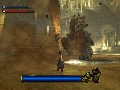
Phase one for Skaroth will have him sitting mostly immobile in the center of the arena. His attacks will consist of Stone Spires that will come from the ground, or a stalagmite which he will grab and proceed to attempt to beat you with. The Stone Spires work much like Jagira's Water Pillars, and you can easily just keep moving to avoid their effects. When he gets ready to smash you with his stalagmite club, move out of the way and beat on him. While he is smashing, he will not move to attempt to re-target you, as he gets a bit focused while using this move. Watch out though if you move to one of his sides. He has a third move, indicated by Skaroth digging his feet slightly into the ground, in which he will heave sideways, smashing into Dal and doing massive damage. If you're on his flank and see him dig in, move back quickly or you'll find yourself short on life in a hurry.
Once Phase one is completed, Skaroth will get angry and begin running around the room. This phase is relatively simple, as his only real attacks are to run you over or to incidentally hit Dal with a flying boulder. Simply use Dragon Forms on Skaroth while at a decent distance and you can avoid both of these obstacles for the most part, while also doing a nice chunk of damage. If you need more Fire Power, just wait till Skaroth gets tired. Every now and then, he'll stop for some breath, and this will give you a chance to stab at him for some free Red Shards.
Phase three will begin when you have taken down Skaroth's core again. This phase will throw Skaroth into area of effect mode. In this phase, Skaroth will let out constant loud roars, slamming his tail into the earth, and causing stalactites to fall from the ceiling. These can be easily avoided by timing your Dodge Rolls, and it is a good time to get in a few hits while he does nothing but watch the roof fall in. Keep up the pressure on him, dodging the incoming falling stalactites, and you can quickly get him down to his final Core Break.
More articles about Dragon Blade: Wrath of Fire